
Learn how to add a new residential property to your DigitalTenant account, including property type, details, images, and unit setup.
Before You Start
- Your profile should be at least 90% complete (check the progress bar on the sidebar).
- Have your property address, rent amount, square footage, and property images ready.
- For residential properties, know your bedroom and bathroom count.
- Your subscription plan determines how many units you can add — the remaining count is shown during the process.
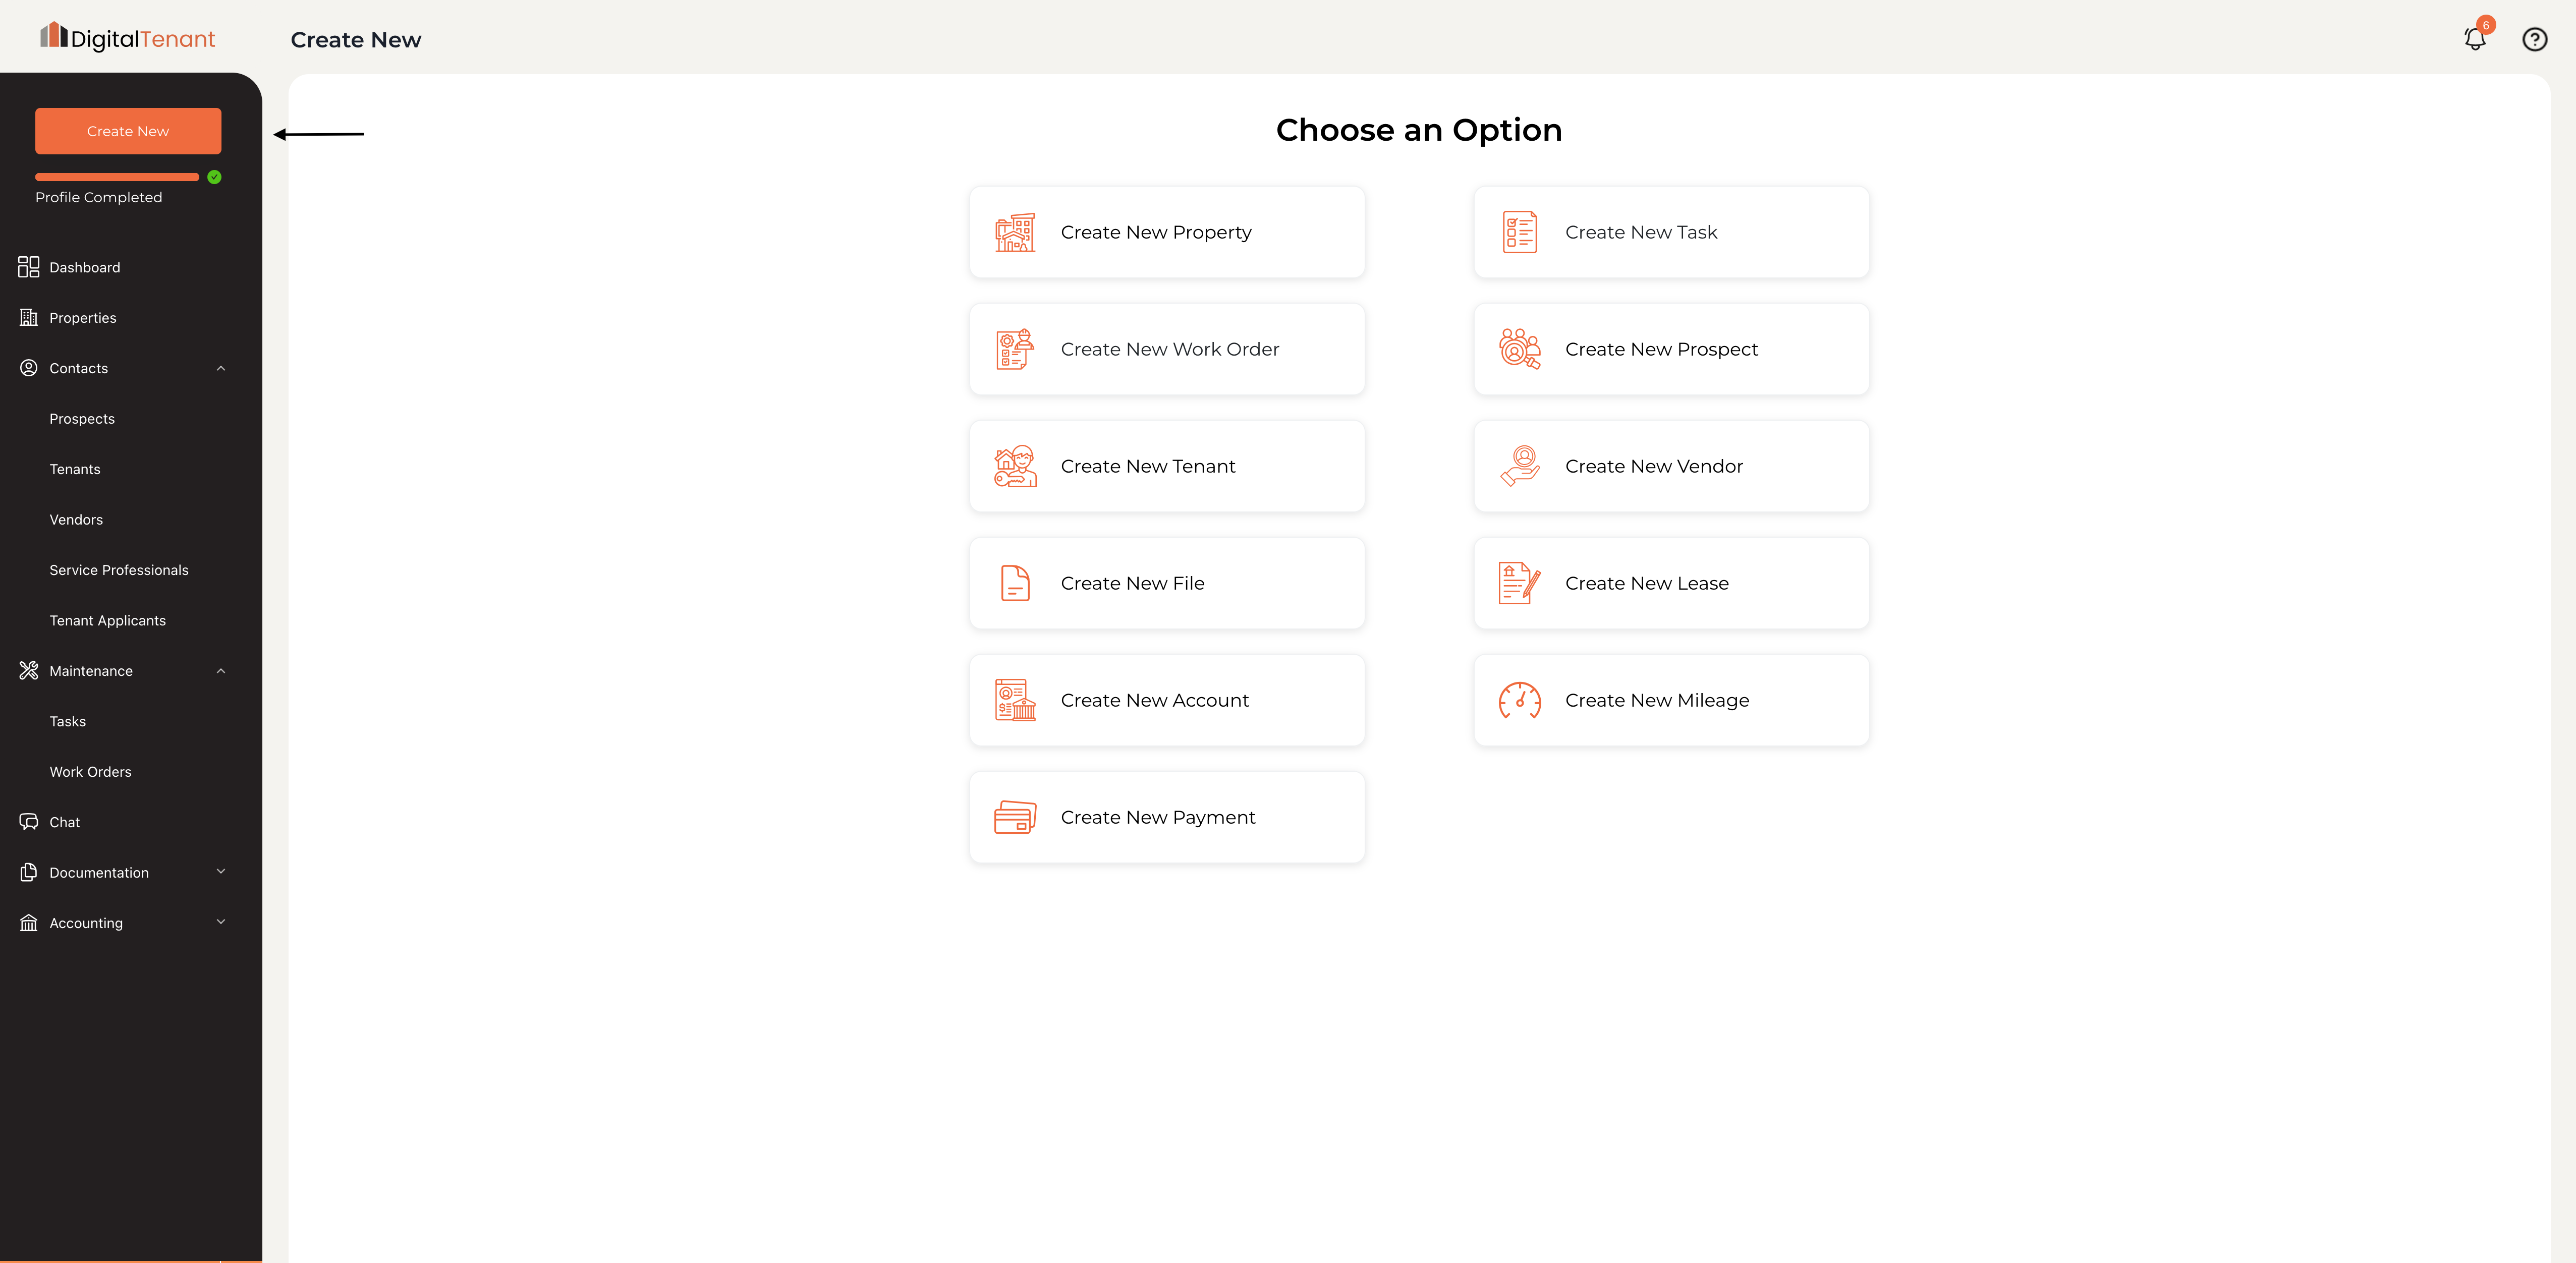
1. Click Create New
From your Dashboard, click the Create New button in the top-left corner of the sidebar. This opens a menu where you can create properties, tenants, work orders, and more.
 2. Select Create New Property
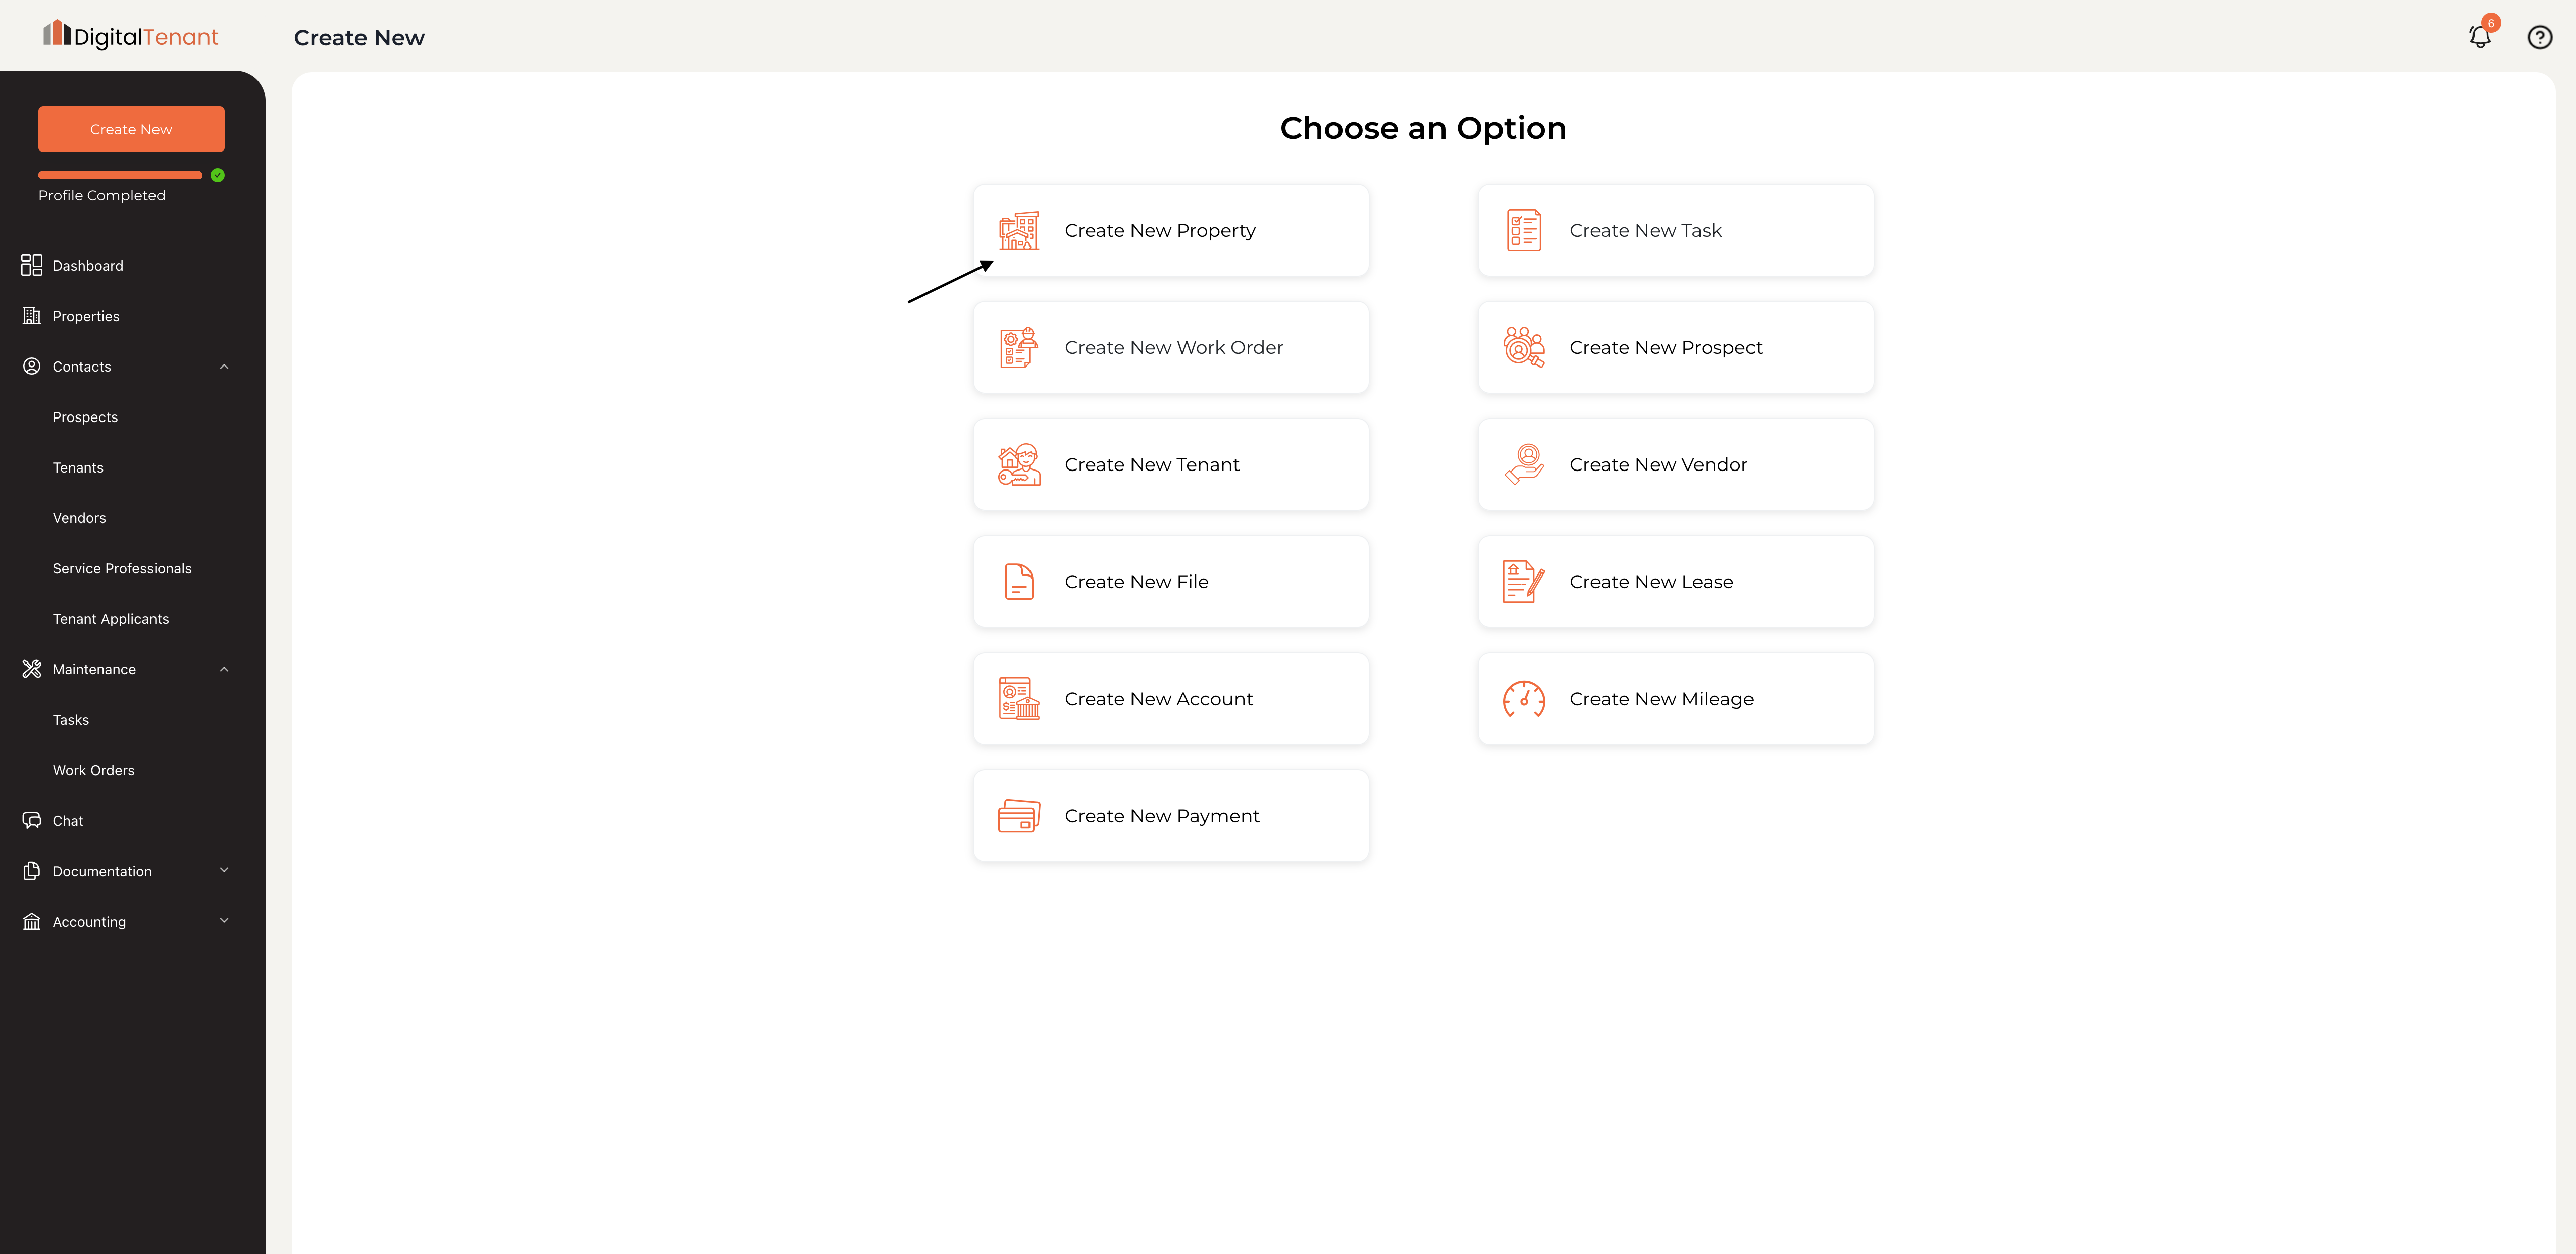
On the Choose an Option screen, click Create New Property — the orange button at the top of the grid.
💡 You'll also see options to create tasks, work orders, tenants, vendors, files, leases, accounts, and mileage entries. These are separate workflows — just select Create New Property to continue.
 3. Choose Your Property Type
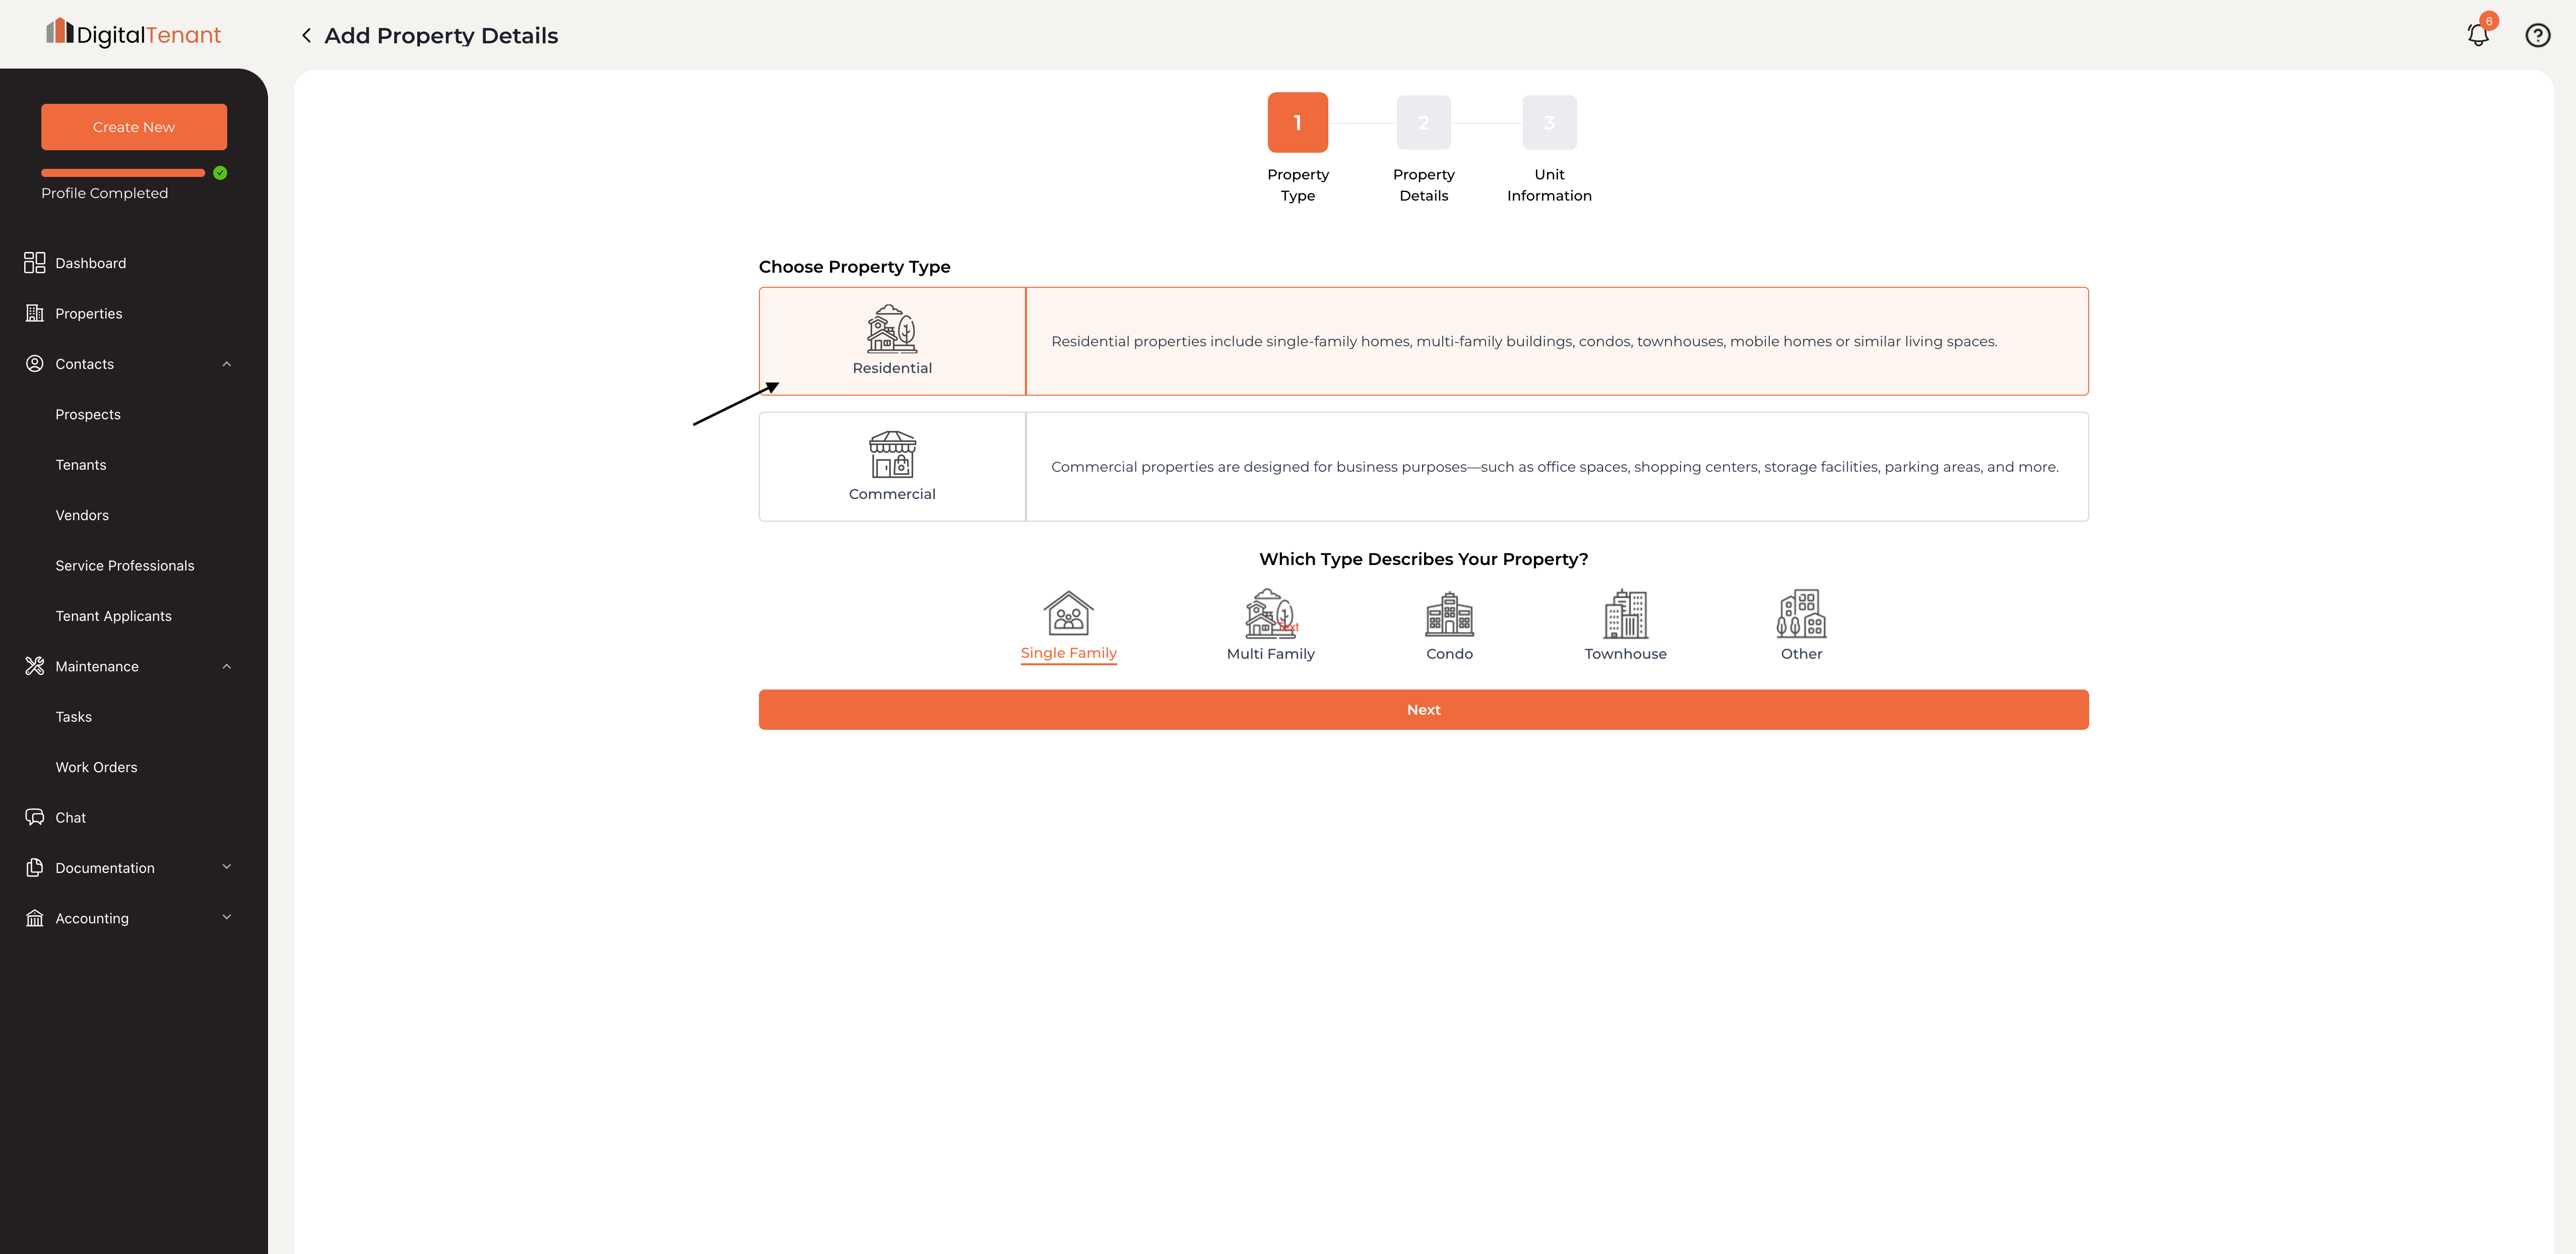
On Step 1: Property Type, you'll see two options:
- Residential — Single-family homes, multi-family buildings, condos, townhouses, mobile homes, or similar living spaces.
- Commercial — Office spaces, shopping centers, storage facilities, parking areas, and more.
Select Residential, then click Next.
 4. Select the Property Subtype
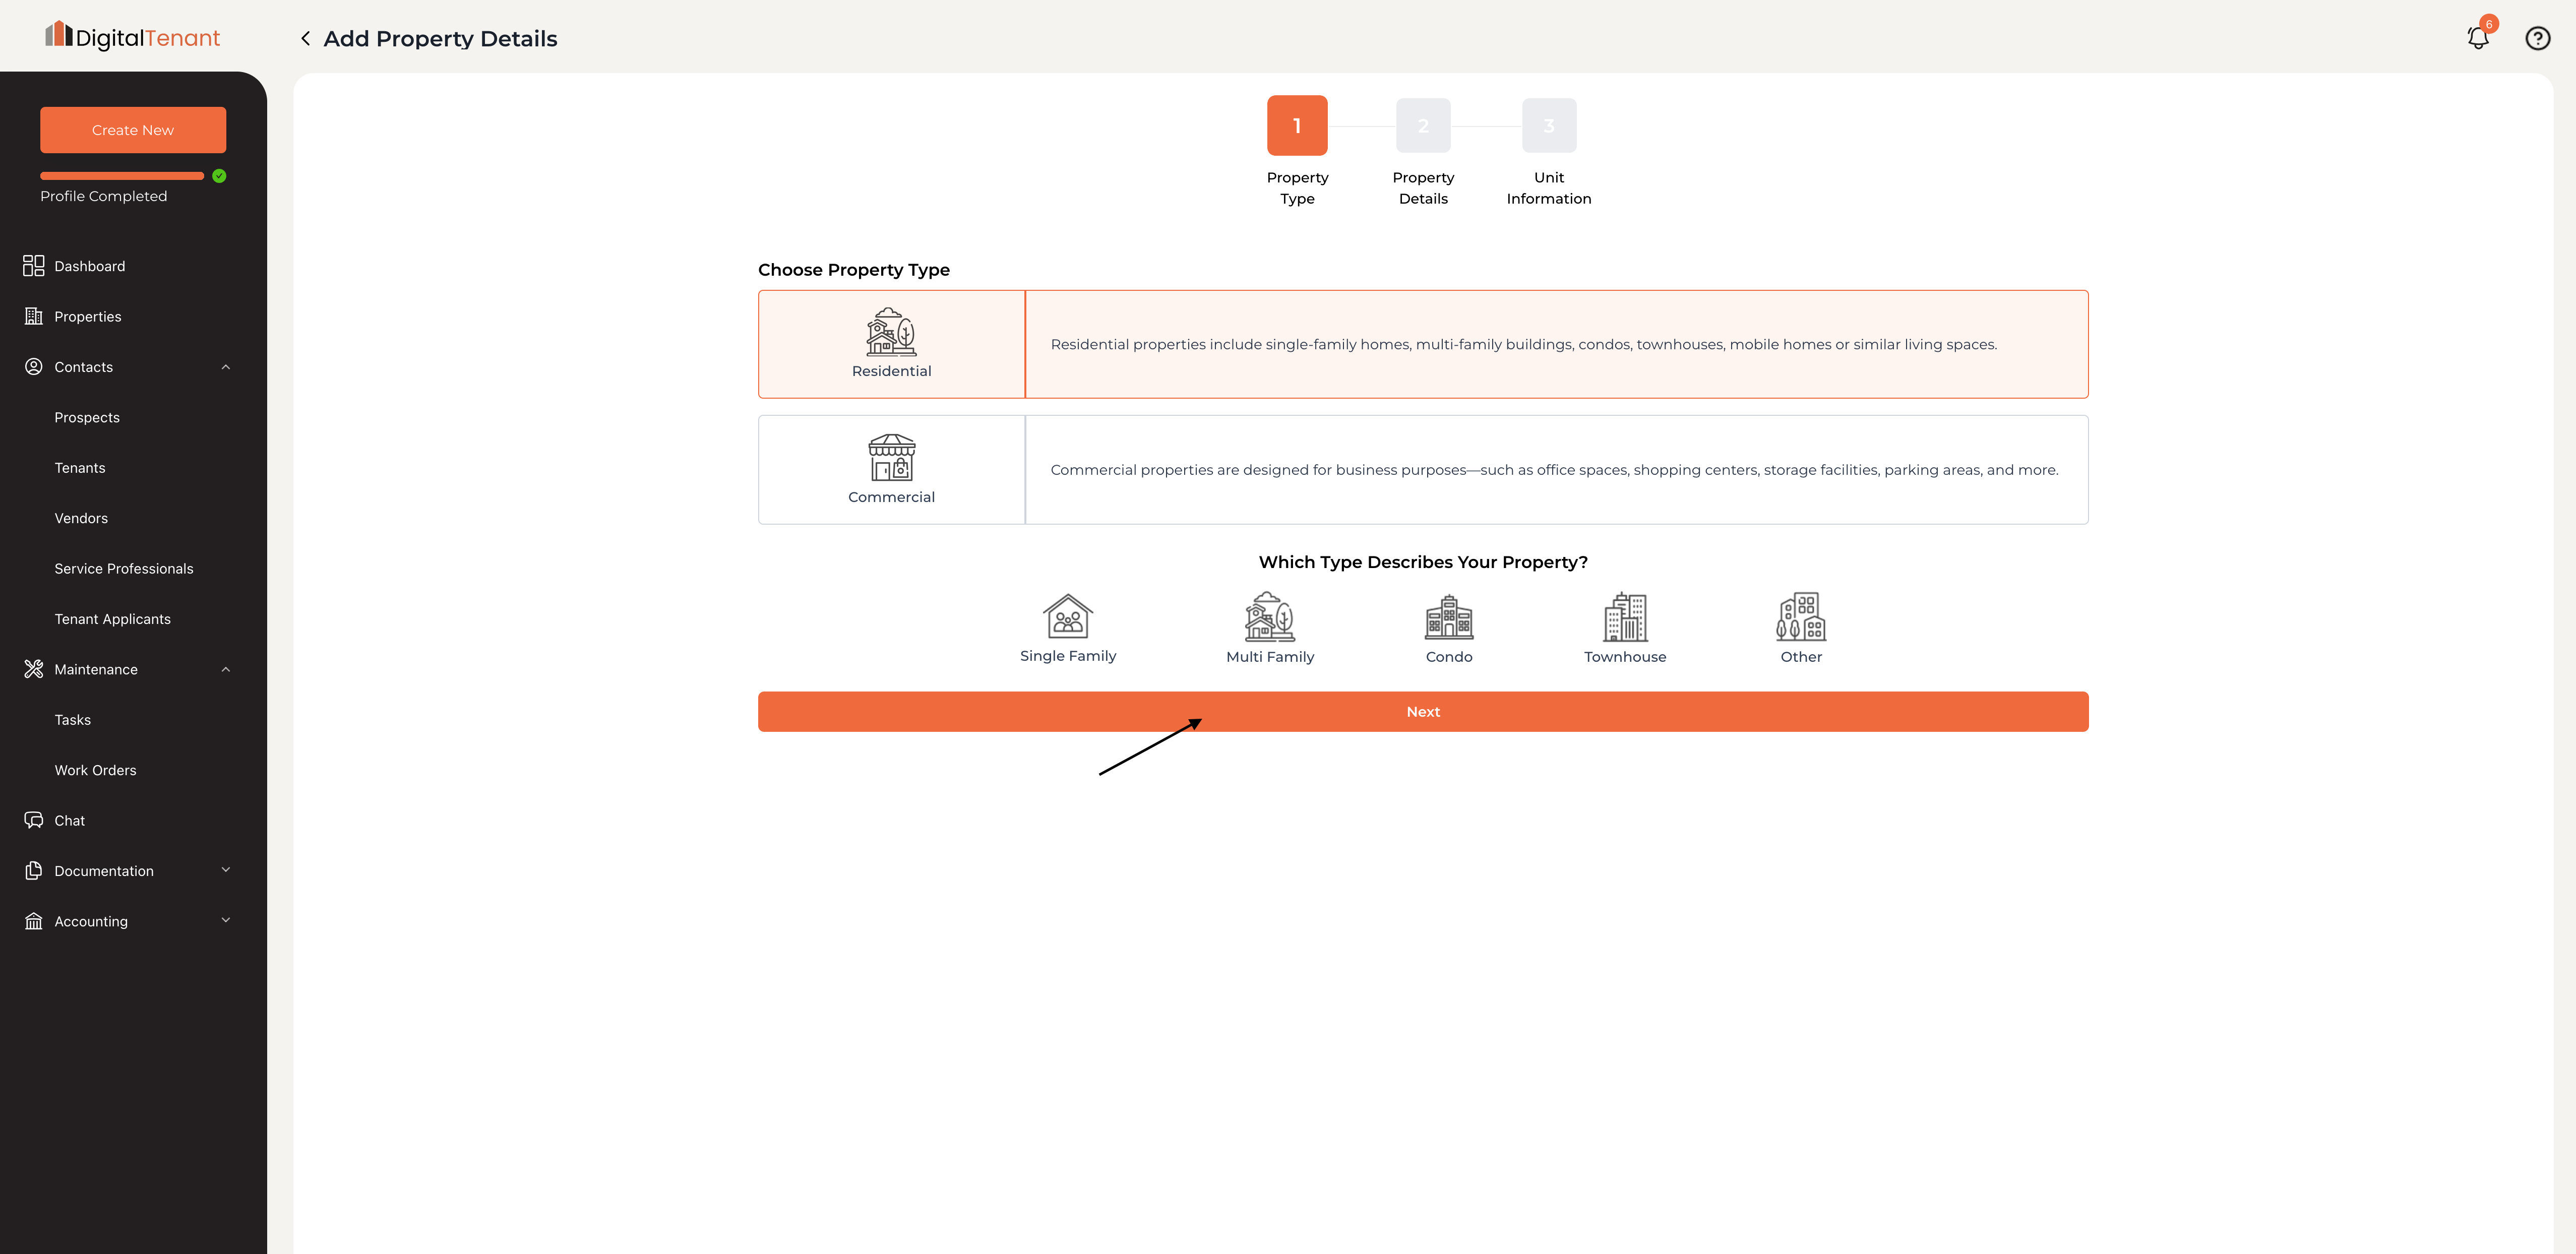
After choosing Residential, a second row appears asking "Which Type Describes Your Property?" Select the option that best fits:
- Single Family
- Multi Family
- Condo
- Townhouse
- Other
Select your subtype, then click Next.
 5. Enter Property Details
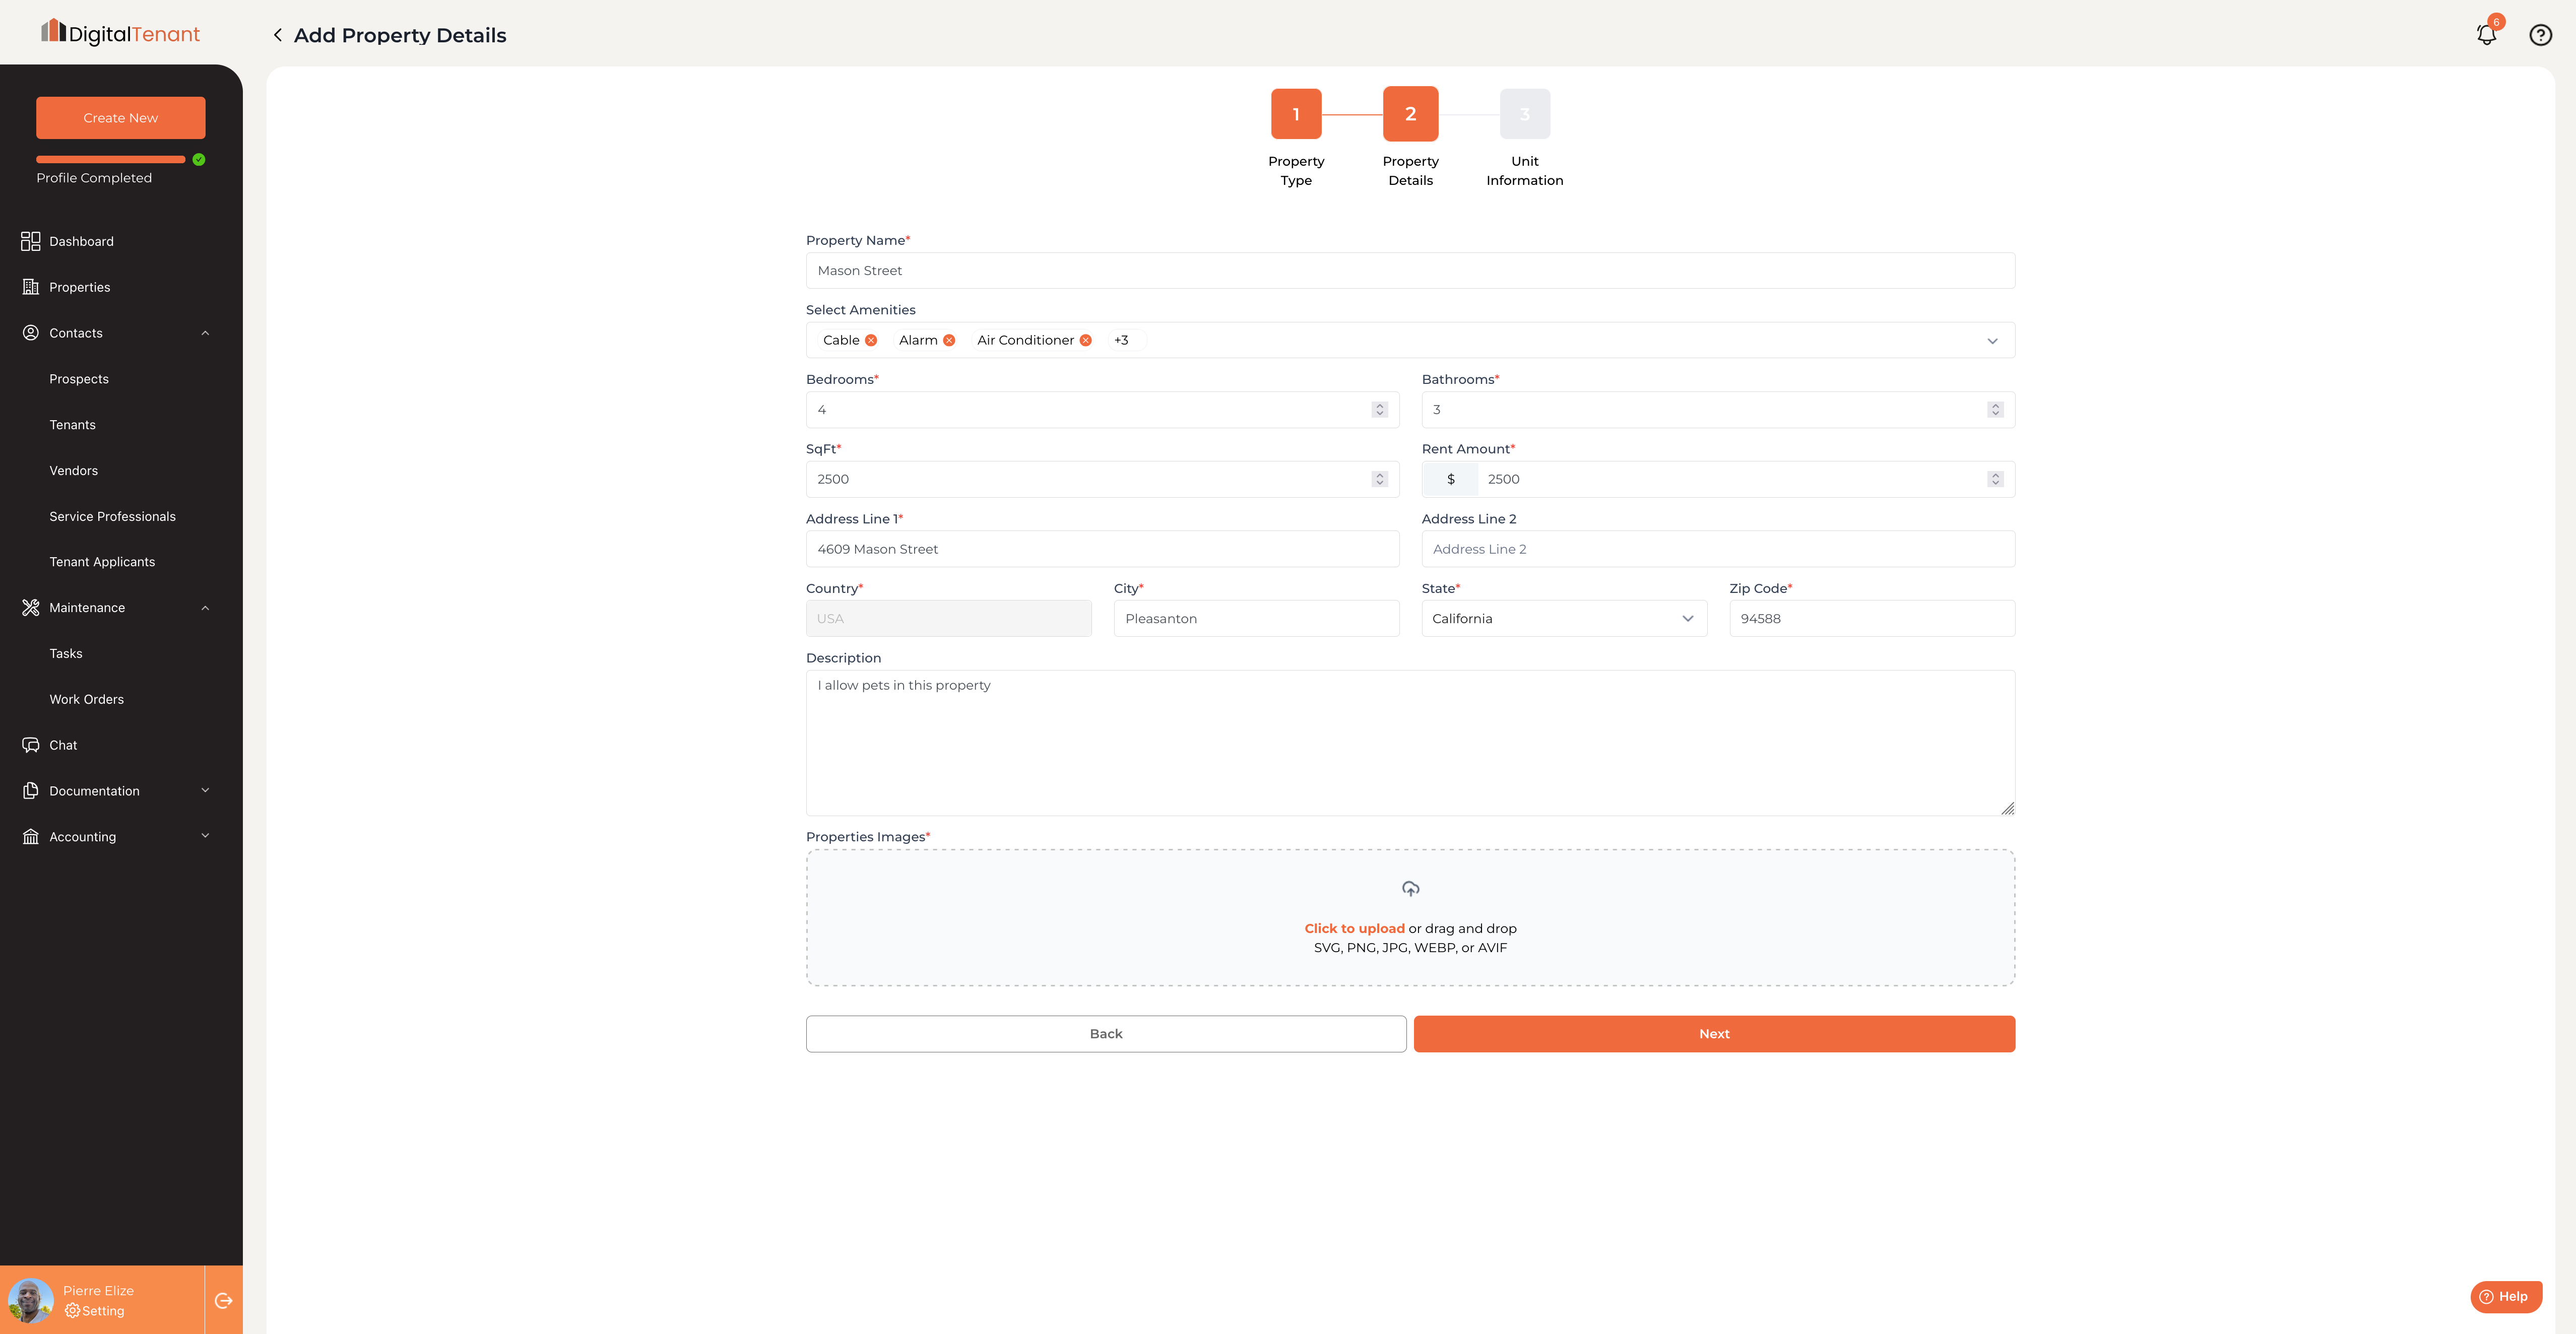
On Step 2: Property Details, fill in the following information about your property:
- Property Name — A recognizable label for your property (e.g., "Ellingwood Drive").
- Select Amenities — Check any that apply, such as Air Conditioner, Cable, Dishwasher, and more. Click + to see all available options.
- Bedrooms — Number of bedrooms.
- Bathrooms — Number of bathrooms.
- SqFt — Total square footage of the property.
- Rent Amount — Monthly rent in dollars.
- Address Line 1 — Street address (required).
- Address Line 2 — Apartment or unit number (optional).
- Country / City / State / Zip Code — Complete the full address.
- Description — Add an optional description or notes about the property.
 6. Upload Property Images
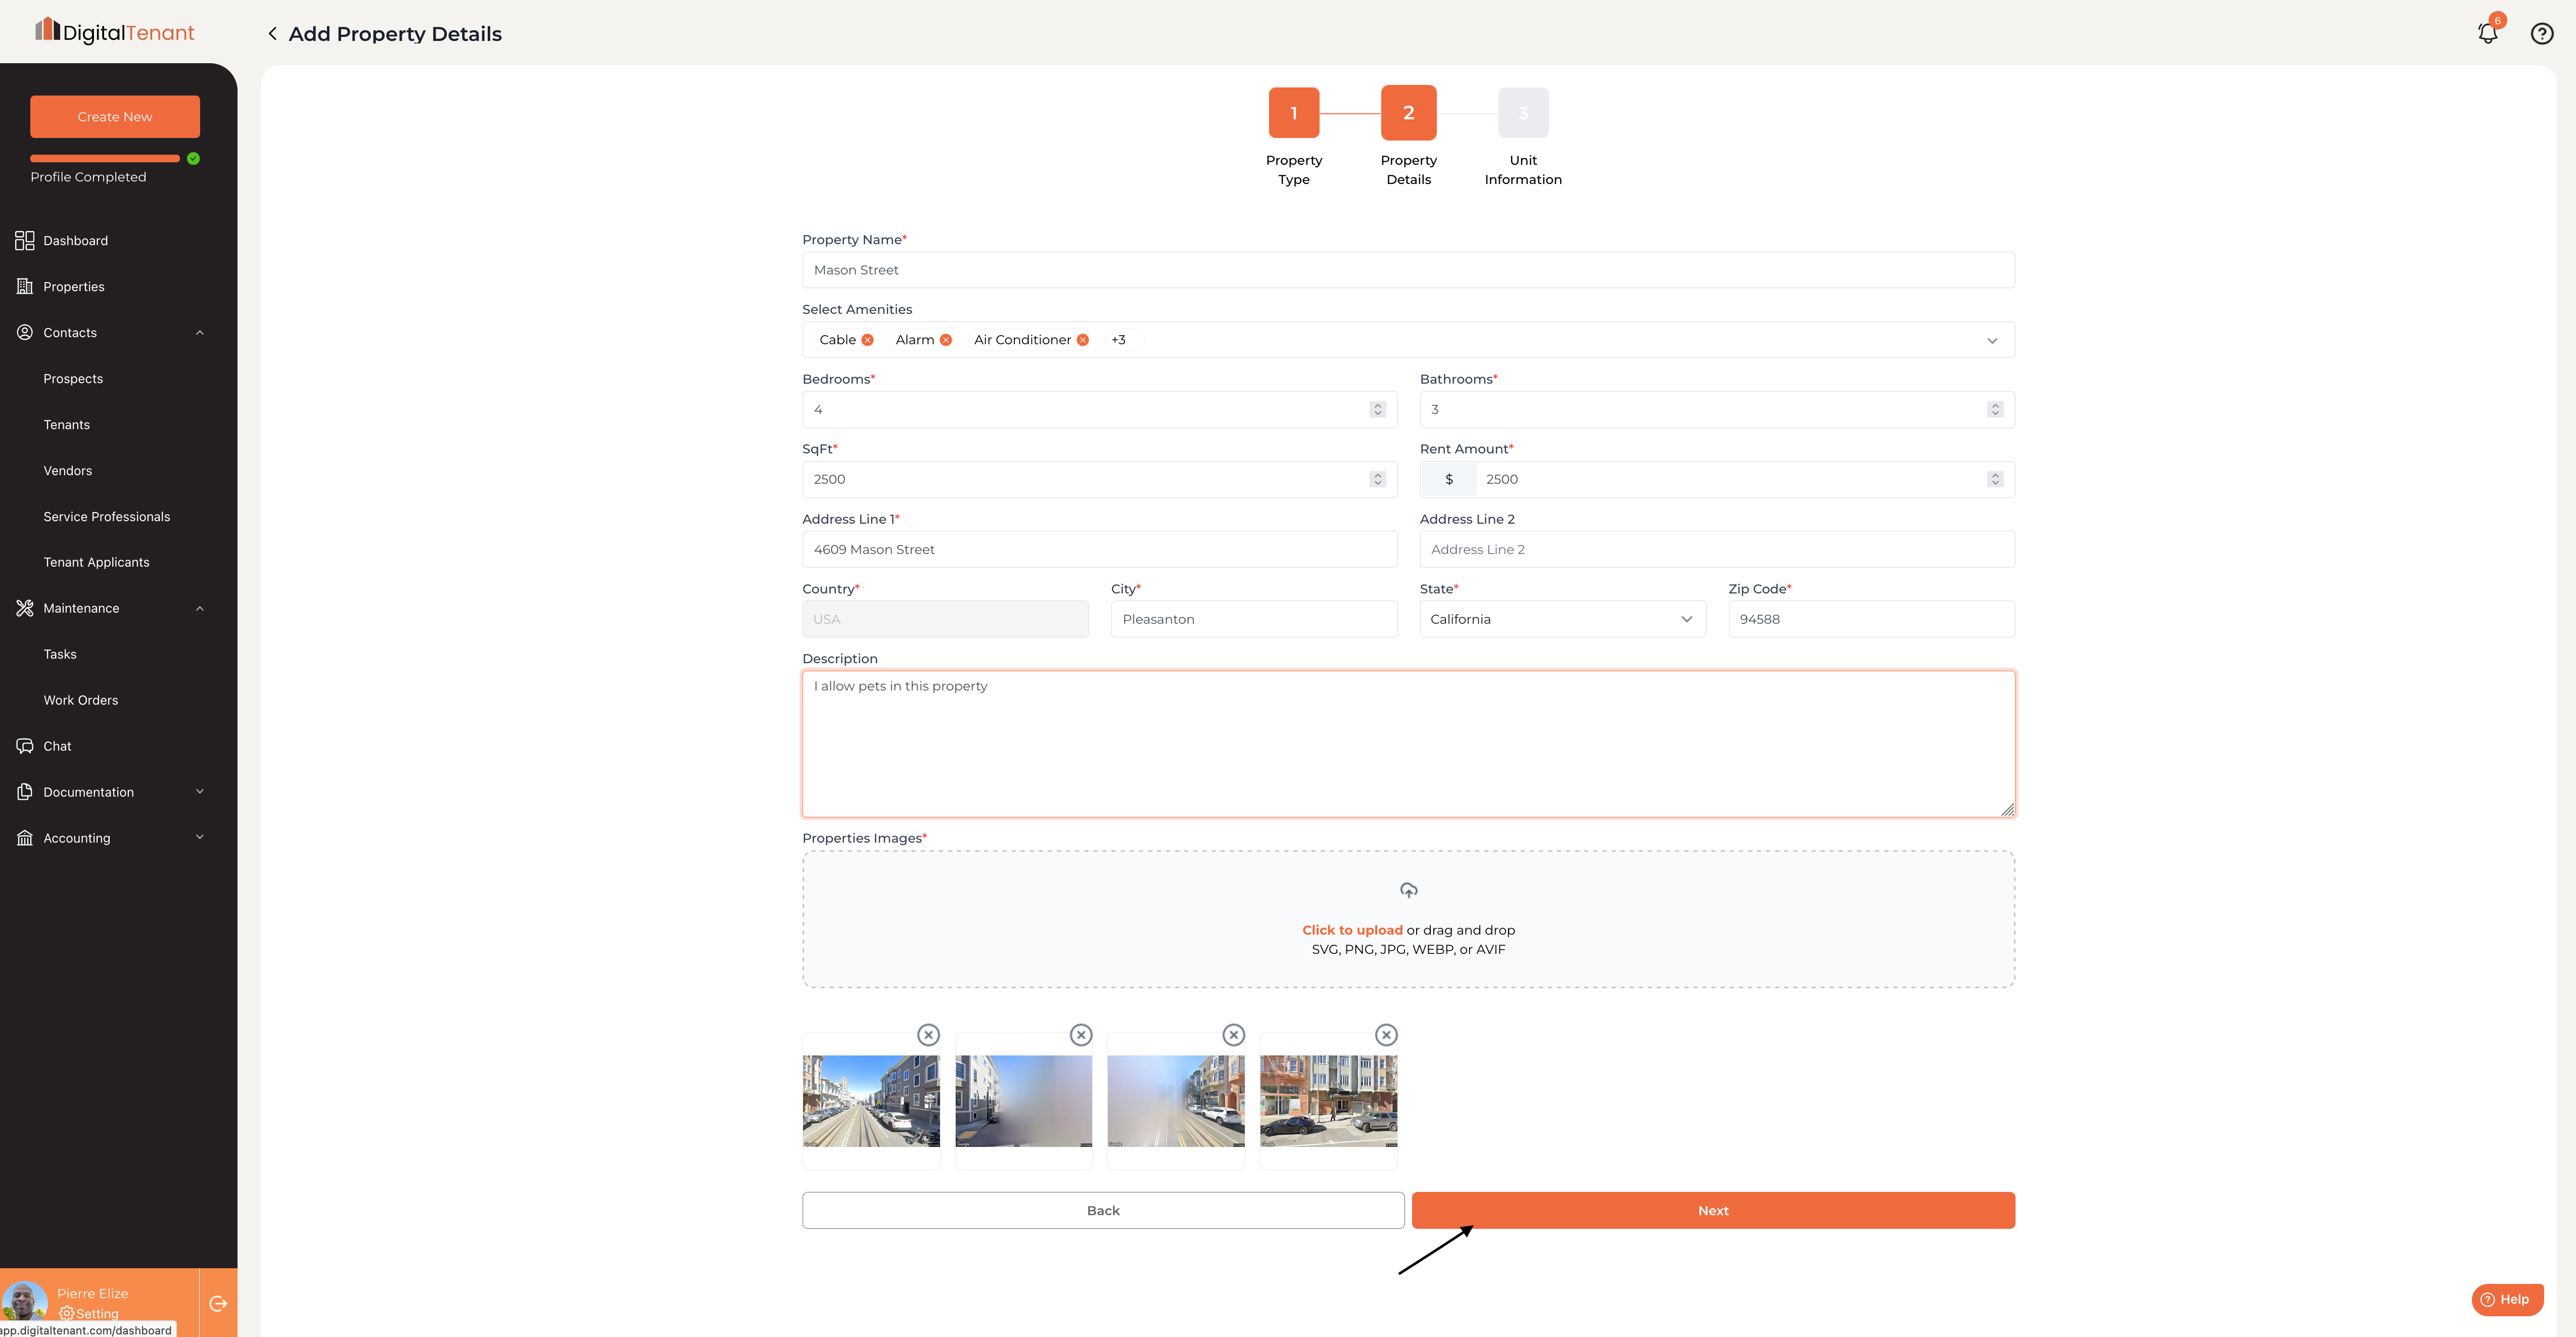
Scroll down to the Properties Images section. You can either click "Click to upload" to browse for files, or drag and drop images directly into the upload area.
Accepted formats: SVG, PNG, JPG, WEBP, or AVIF.
Each uploaded image appears as a thumbnail with an X button to remove it. When everything looks good, click Next.
 7. Set the Number of Units
On Step 3: Unit Information, enter the number of units to create for this property. You'll see a message showing how many units remain on your current plan (e.g., "You have 20 units remaining now").
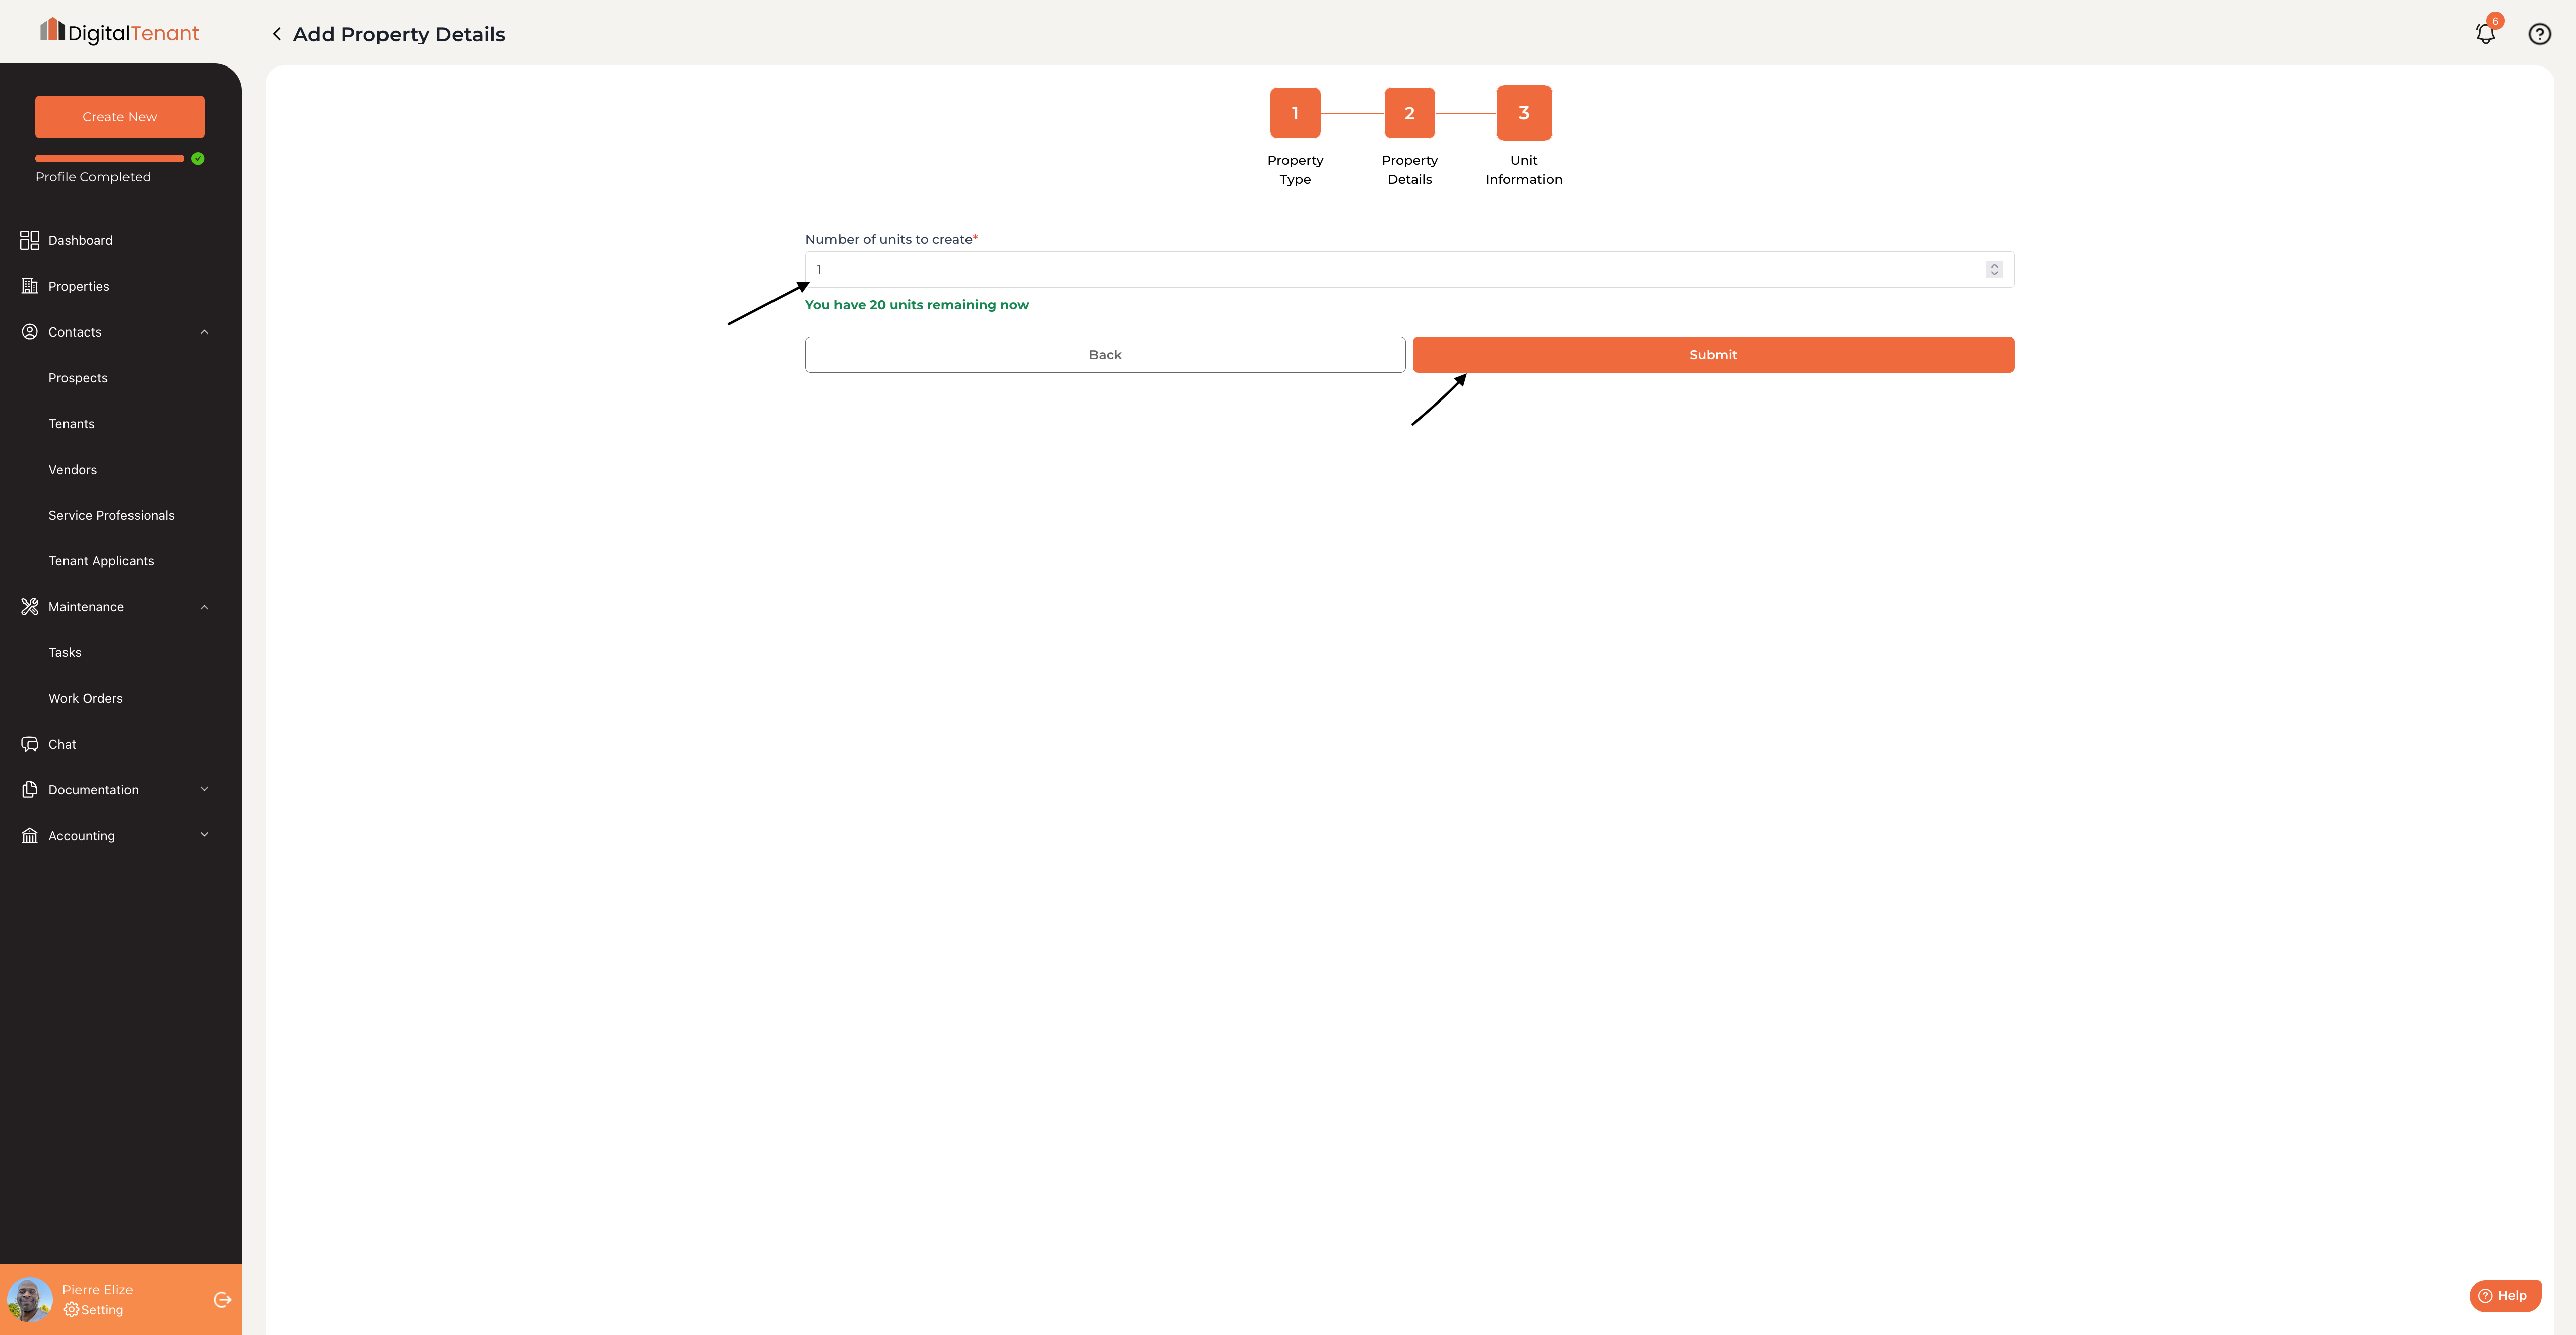 Click Submit to finalize your new property.
What Happens Next
Your new residential property will now appear in the Properties list on the sidebar. From there you can:
- Add tenants to the property.
- Create and manage leases.
- Submit and track work orders.
- Upload documentation.
- Set up accounting for the property.
💬 Still need help? Contact us at support@digitaltenant.com or use the Help button in the bottom-right corner of your dashboard.