
Tasks in DigitalTenant help you track and manage work items across your properties — from maintenance issues to follow-ups. This guide walks you through creating a new task from scratch, assigning it, setting a priority, and submitting it for tracking.
Before You Start
- You must be logged into your DigitalTenant account.
- If you plan to assign the task to a team member, make sure they have an account in DigitalTenant.
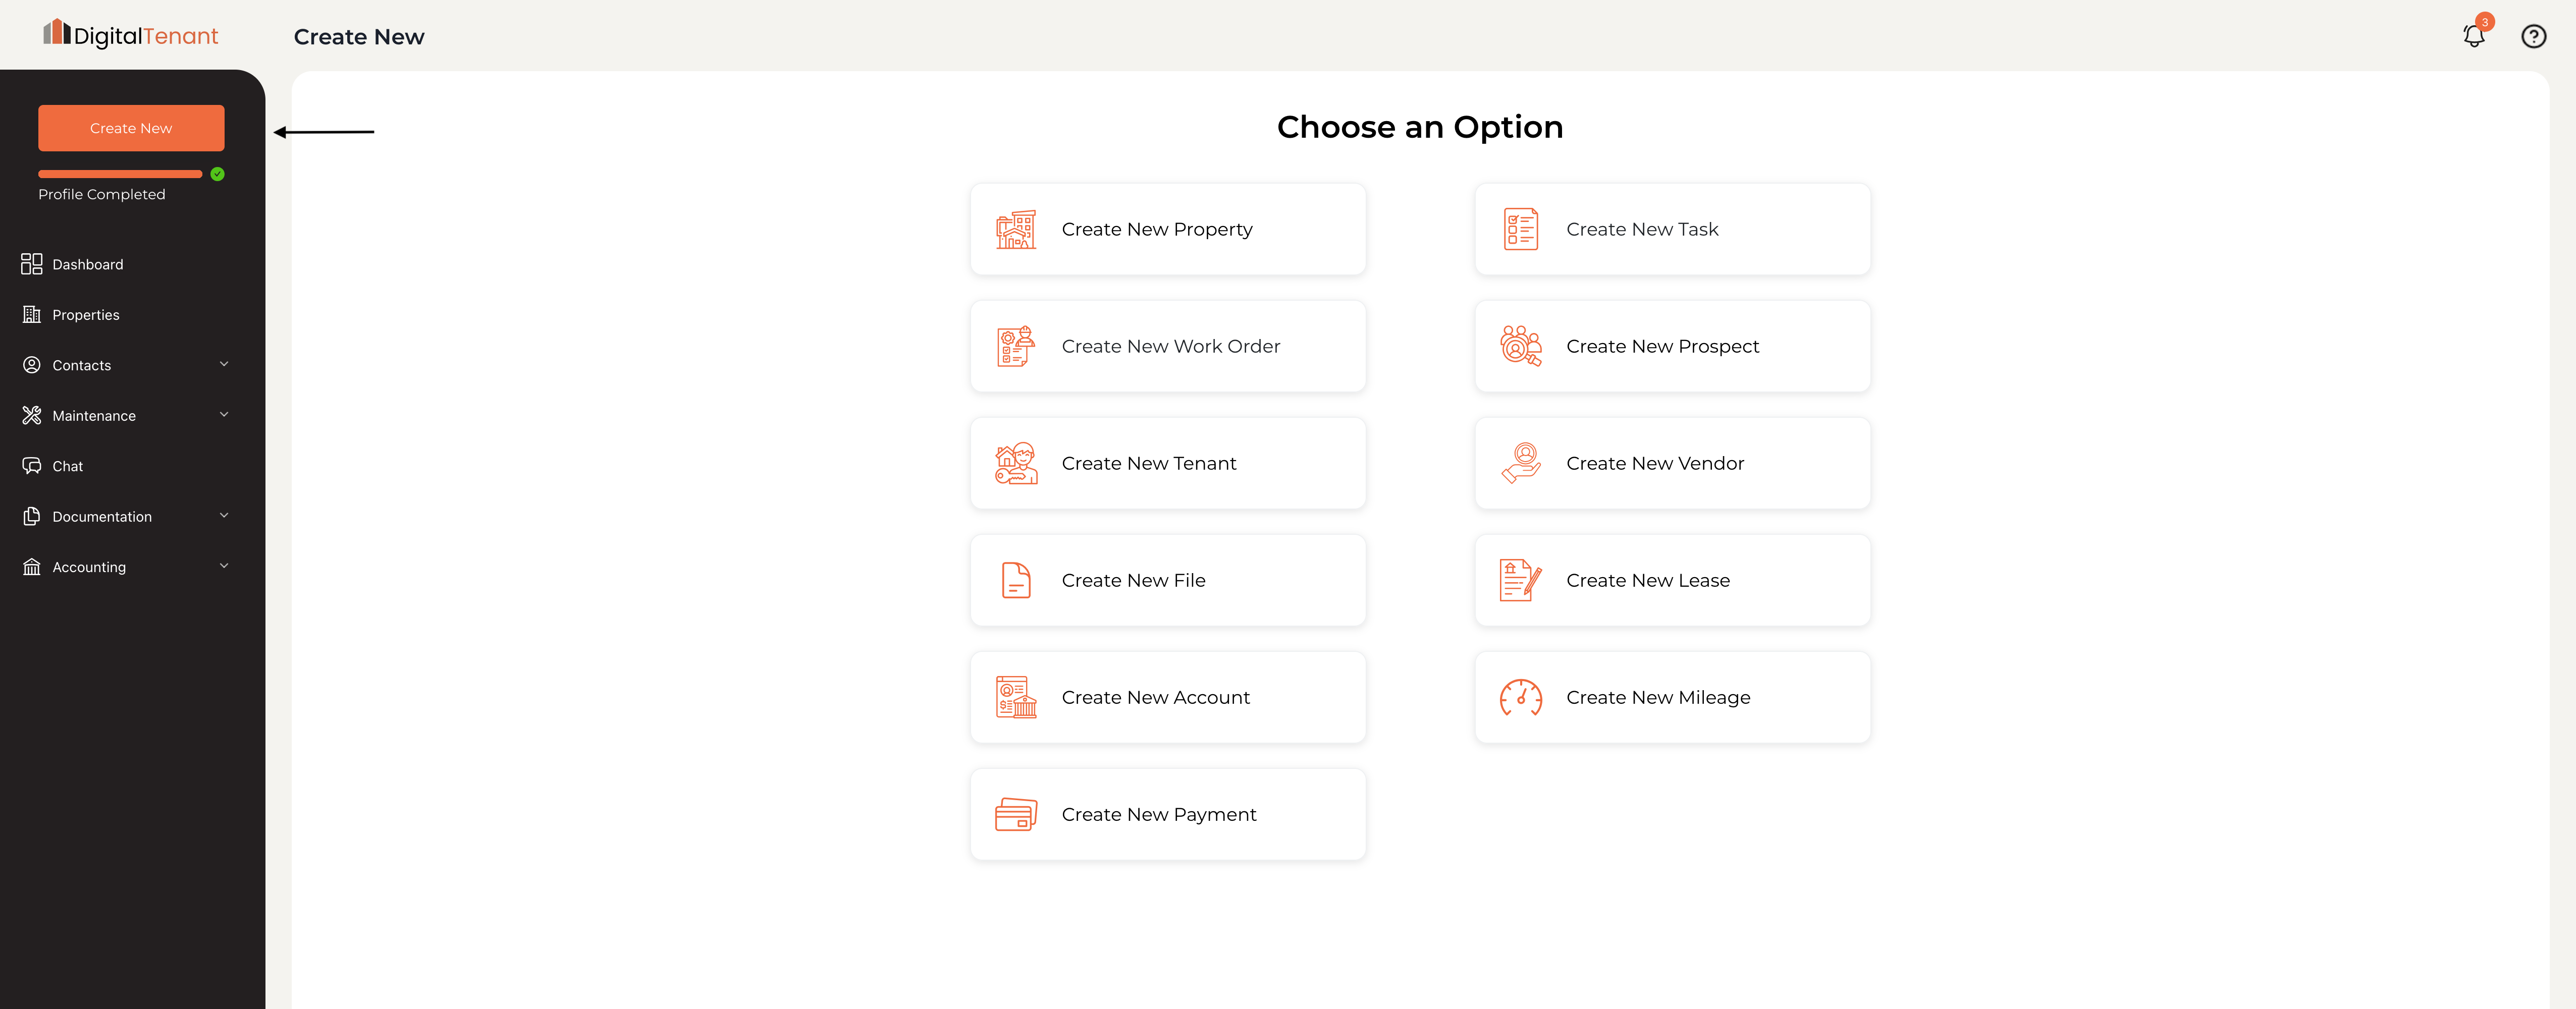
1. Click Create New
From your Dashboard, click the Create New button in the top-left corner of the sidebar. A menu will appear with all the record types you can create — properties, tasks, work orders, tenants, leases, and more.
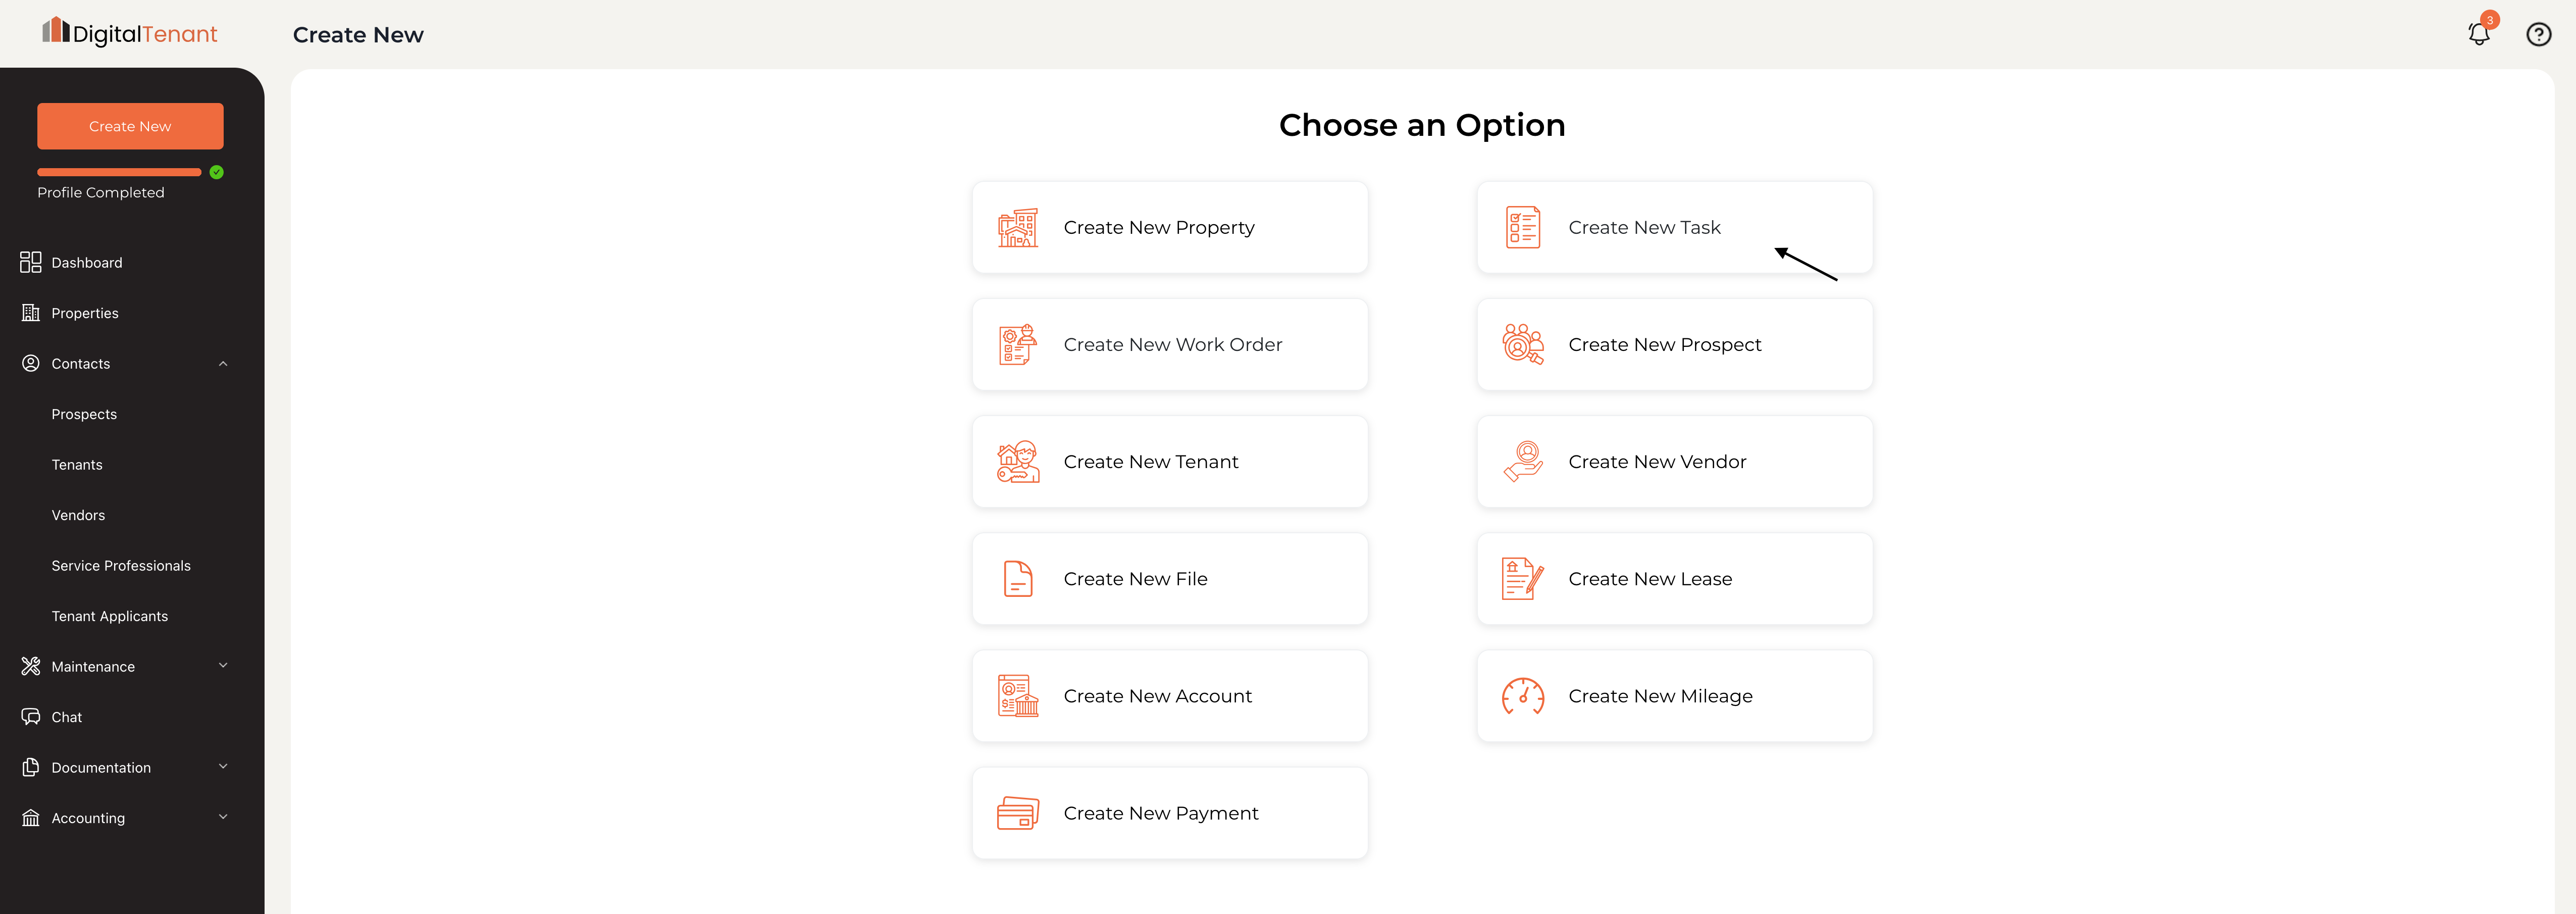
2. Select Create New Task
From the Choose an Option menu, click Create New Task. This opens the Add New Task form.
💡 You'll also see options to create Work Orders, Tenants, Leases, and more from this same menu. For maintenance items that require a vendor or contractor, use Create New Work Order instead.
3. Fill In the Task Details
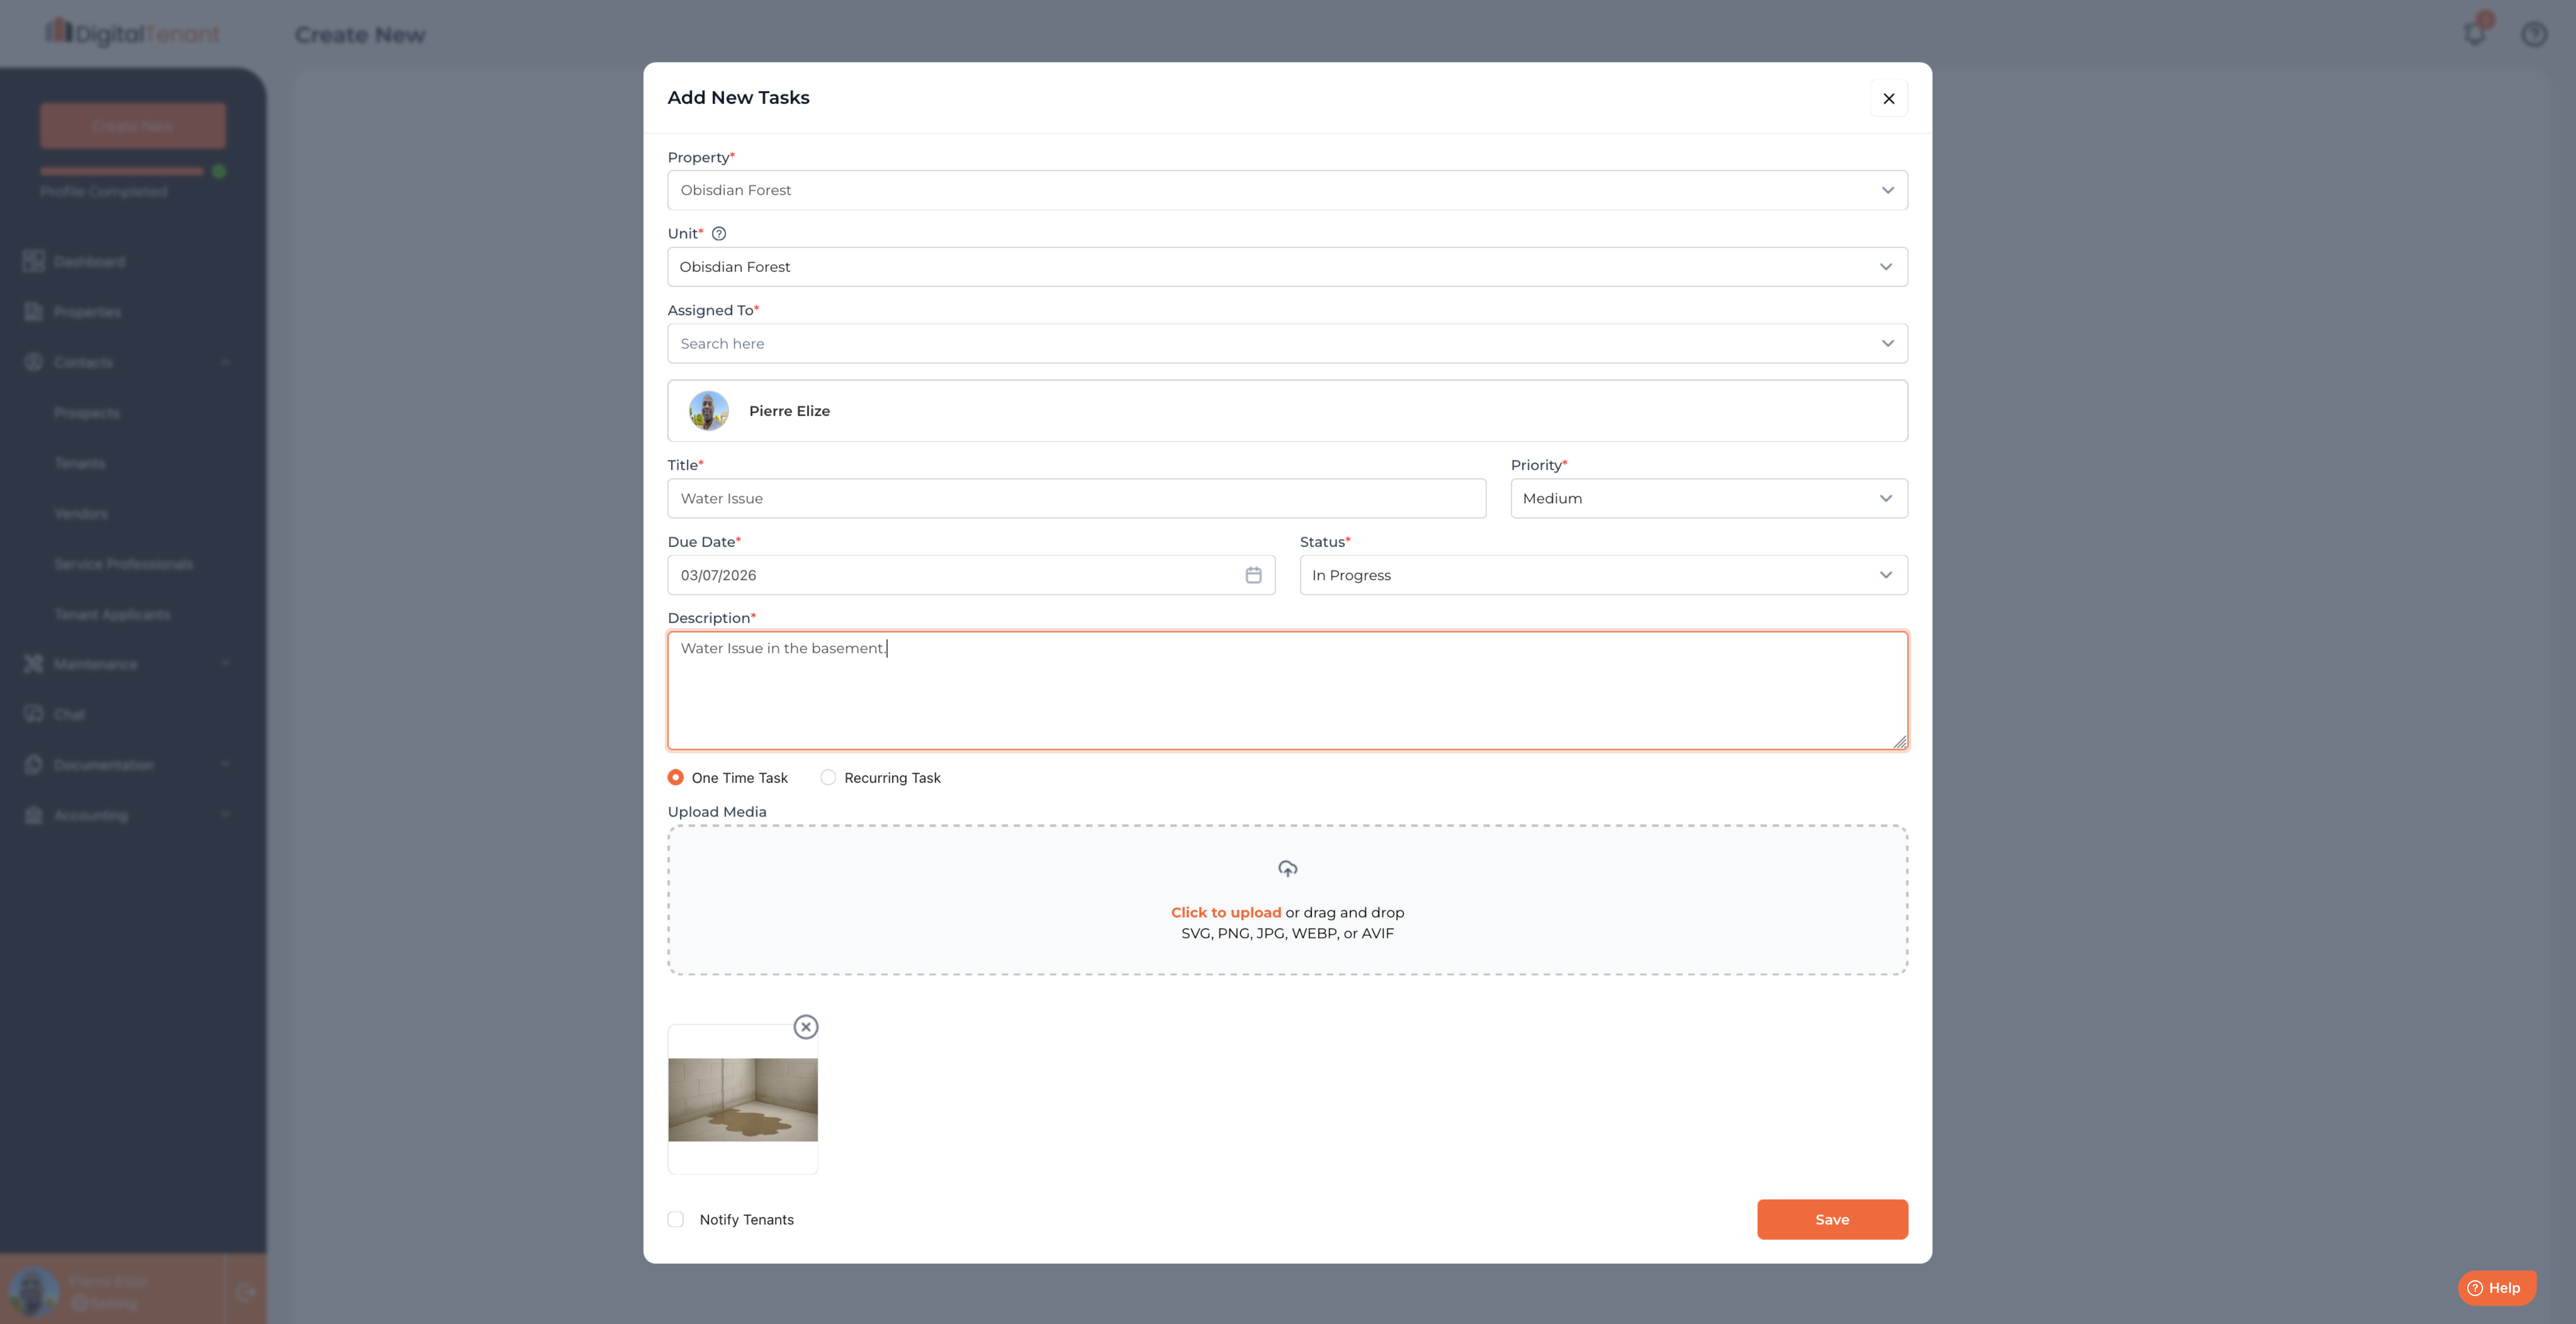
Complete the following fields in the Add New Task form:
- Property — Select the property this task is associated with.
- Unit — Optionally select a specific unit within the property.
- Assigned To — Search and select the team member responsible.
- Title — A short, descriptive name (e.g., "Water Issue in Basement").
- Priority — Set the urgency: Low, Medium, or High.
- Due Date — Select a deadline for the task.
- Status — Set the current status: Not Started, In Progress, or Completed.
- Description — Add any relevant details or context.
- Task Type — Select One Time Task or Recurring Task.
- Upload Media — Optionally attach photos or files (SVG, PNG, JPG, WEBP, or AVIF).
4. Click Save
Once all required fields are filled in, click the Save button in the bottom-right corner of the form. The task will be created and will appear in your Tasks list in the sidebar.
📝 If you have the Notify Tenants toggle enabled at the bottom of the form, relevant tenants will receive a notification about this task.
What Happens Next
After saving, your new task will appear in the Tasks section on the sidebar. From there you can:
- Update the task status as work progresses.
- Add comments or additional media.
- Reassign the task to a different team member.
- Convert the task into a Work Order if vendor involvement is needed.
💬 Still need help? Contact us at support@digitaltenant.com or use the Help button in the bottom-right corner of your dashboard.